Mail
Mail configuration is available through DevilWEB administration panel and by the devil mail and devil dns modules.
Warning
The address of the mail server depends on the number of the hosting server. For the server s0.serv00.com it will be the address mail0.serv00.com, for the server s1.serv00.com - mail1.serv00.com, for the server s2.serv00.com - mail2.serv00.com etc. In the examples the address mailX.serv00.com was used.
DNS configuration
Information
Before starting the configuration you can optionally delegate the domain to by handled by serv00.com servers. During the delegation appropriate entries for mail handling are automatically added and they do not need to be configured additionally.
If you use DNS from another service provider and want to use serv00.com mail, you should:
- add a field of type
MXwith the highest priority (for example 1), with the contentmailX.serv00.com - add a field of type
TXTwith content:v=spf1 a mx include:mailX.serv00.com -allAfter configuring DNS go to the accounts configuration.
The RestrictSPF option
The RestrictSPF option in the mail settings modifies the treatment of messages for which the SPF policy test did not return pass (always accepted) or hardfail (always rejected).
Command syntax:
devil mail options DOMAIN restrictspf on|off|reject
on - messages will be marked as SPAM and, if the movespam option is enabled, moved to the Junk directory (INBOX: pass; SPAM: softfail/neutral/permerror; REJECT: hardfail)
off - all messages will be accepted (INBOX: pass/softfail/neutral/permerror; REJECT: hardfail)
reject - messages will be rejected by our mail server (INBOX: pass; REJECT: hardfail/softfail/neutral/permerror)
Newly added domains have restrictspf set to on by default.
DevilWEB
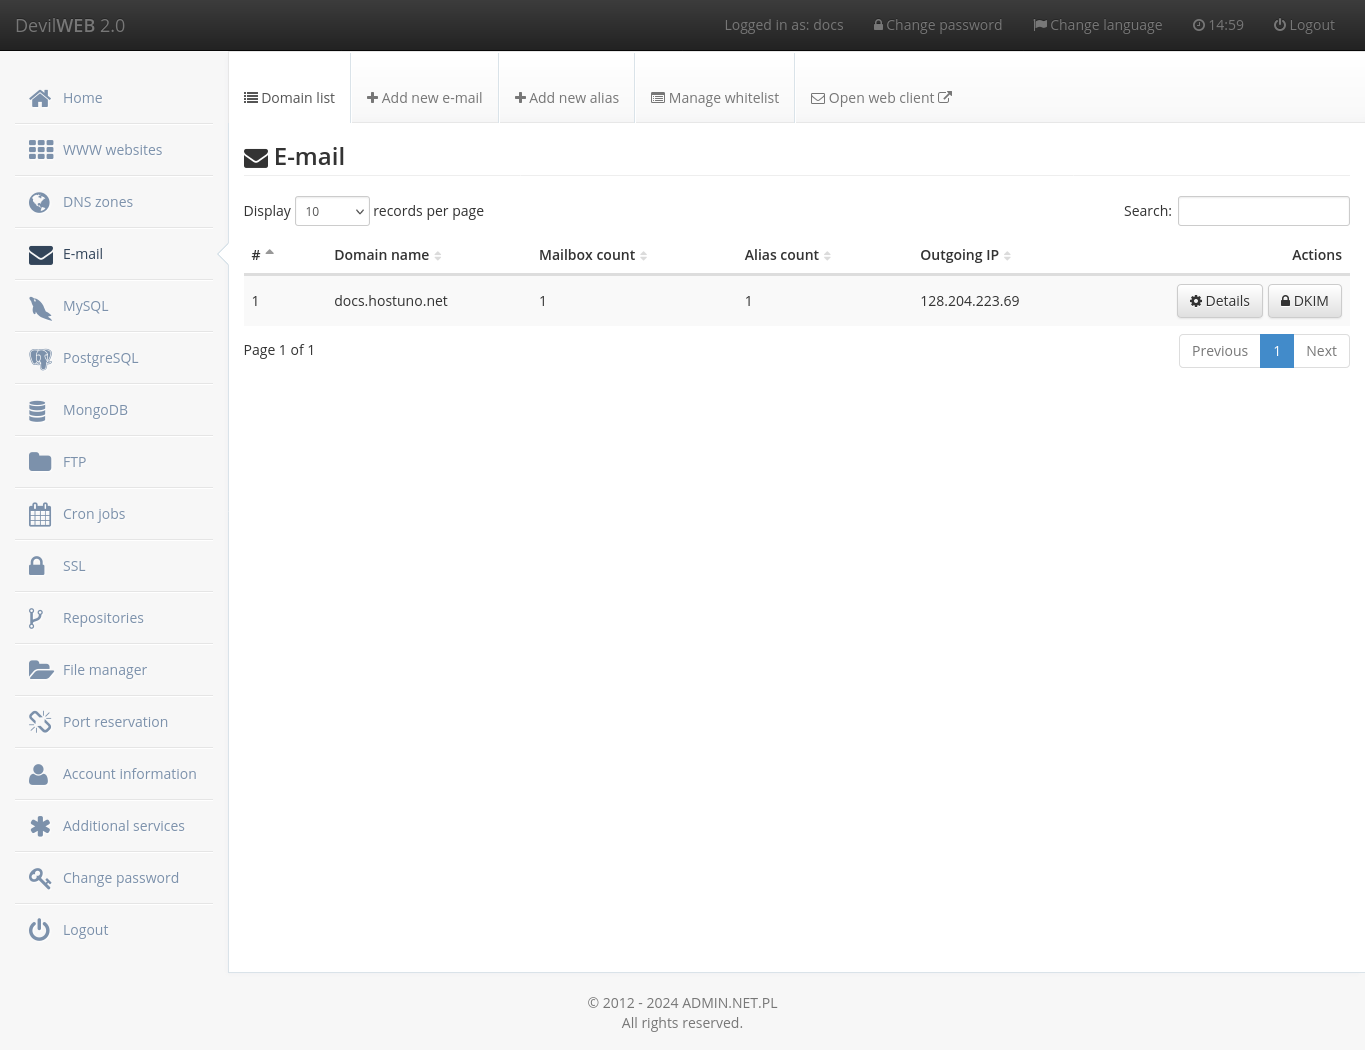
After logging in to the administration panel mail management can be found in the E-mail tab. After clicking, the list of domains for which at least one account has been configured is displayed.
Adding an account
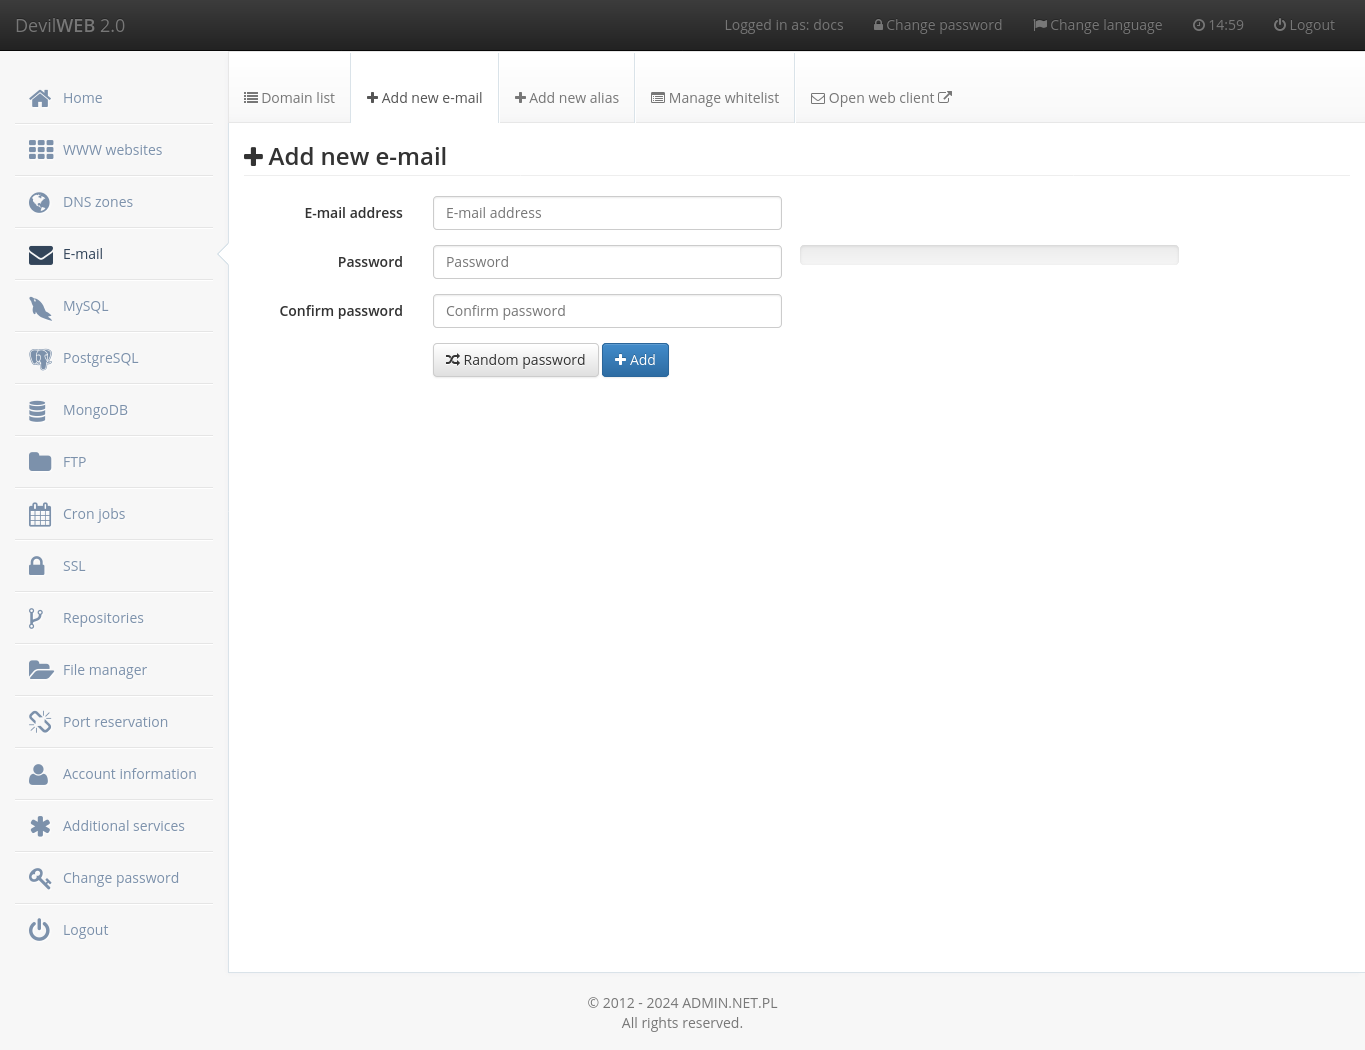
To add a new e-mail address click on + Add new e-mail and enter the complete e-mail address and password.
Adding a mail alias
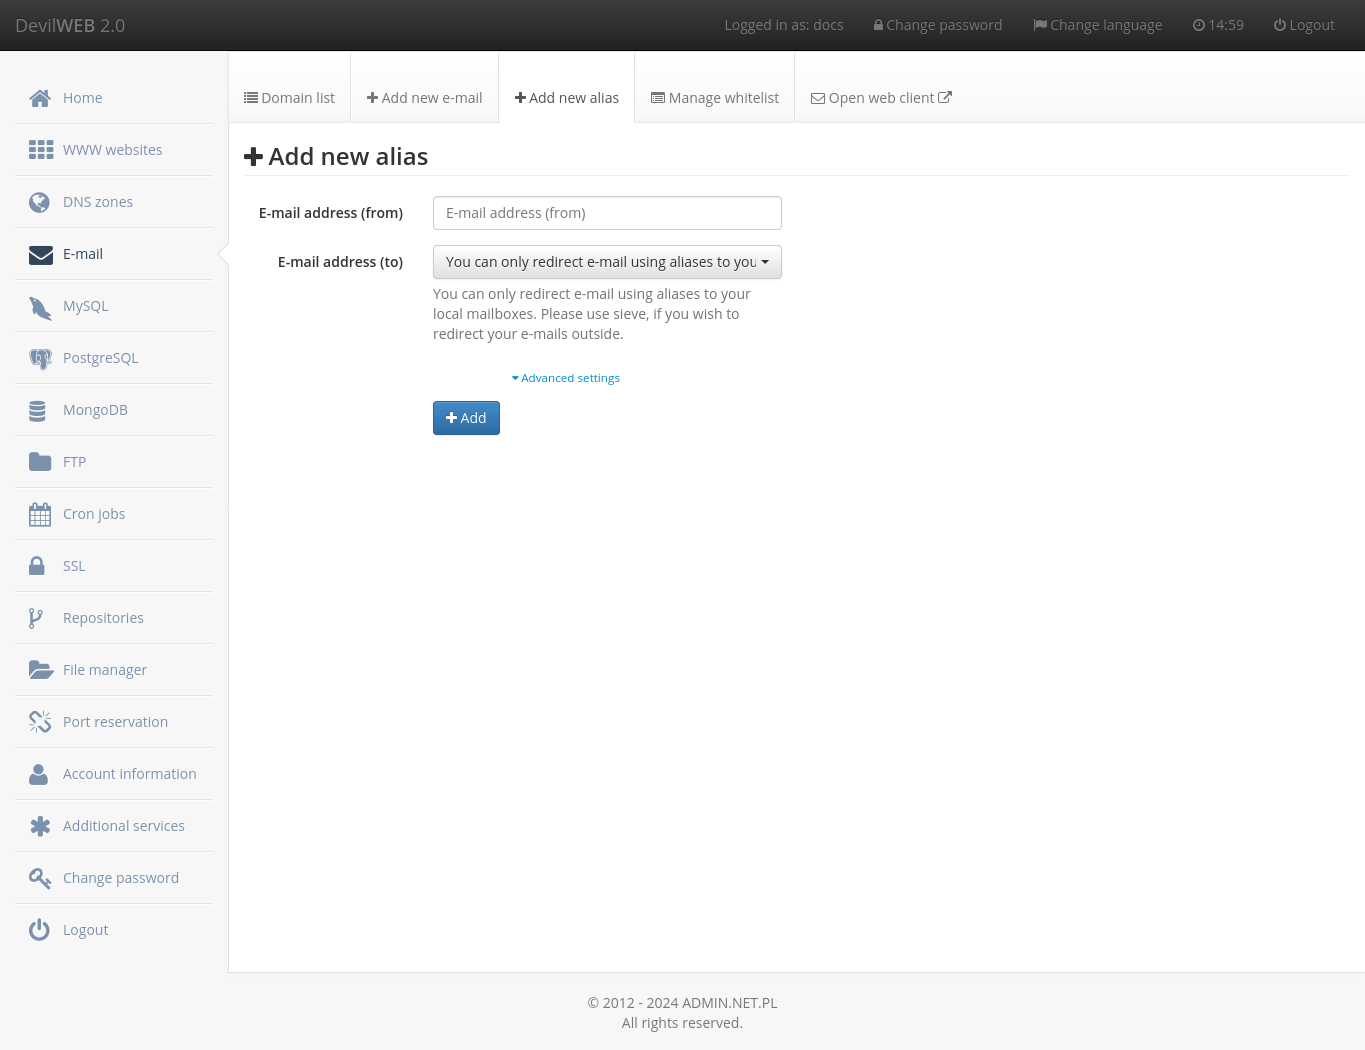
To add a new e-mail alias, click + Add new alias and enter the full e-mail address and select an existing e-mail mailbox. In order to redirect e-mail messages directed to all e-mail addresses in a given domain, you need to expand Advanced settings, select the alias type Catch-all and enter the domain. To redirect mail to an e-mail address outside the serv00.com server, use Sieve.
Domain configuration
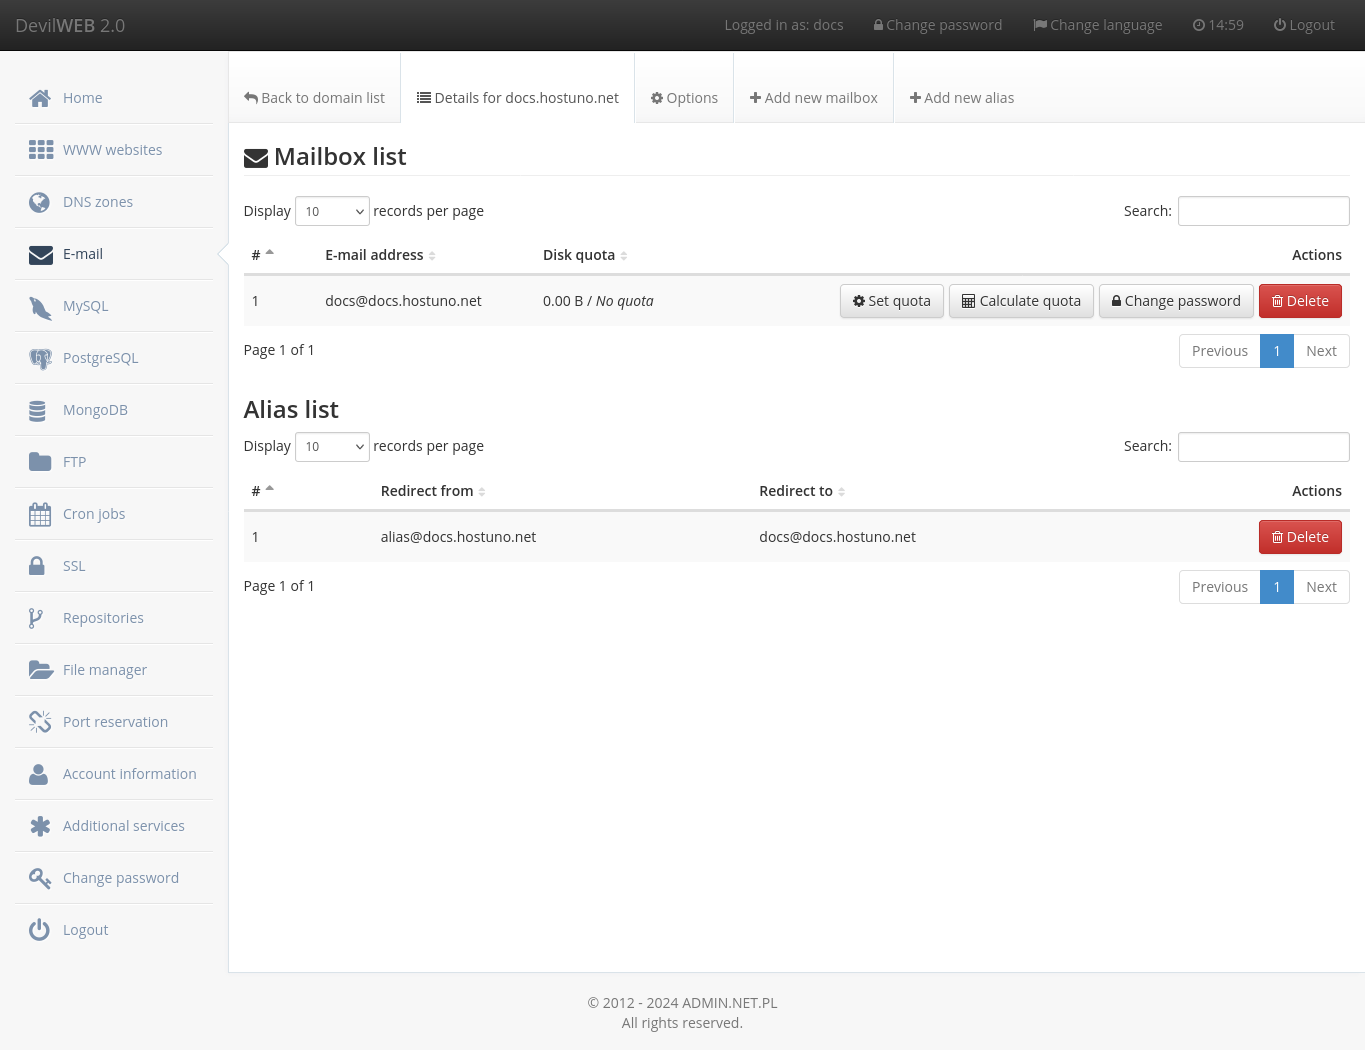
After clicking on the Details button, the list of e-mail addresses and aliases in the selected domain will be displayed. It is also possible to set a disk space limit for the account, the so-called quota.
In the options tab, it is possible to set:
- RBL checking
- Spam filter
- Restrict SPF
- Move spam
- Outgoing mail IP
- Login IP whitelist
- Hide sender's IP
Whitelists
The management of white lists is available by clicking on Manage whitelist. To add a trusted domain go to + Add domain.
DKIM
To enable the DKIM support, click on the DKIM action next to the selected domain. Then Add DNS record automatically or Show DNS record ➡ Sign domain.
Warning
Selecting the option Show DNS record instead of Add DNS record automatically will generate a key and e-mail messages are signed immediately - add the TXT entry to the domain as soon as possible - otherwise, e-mails may be marked as untrusted or rejected by mail servers. Re-entering the DKIM action will show the record that needs to be added in DNS again.
Setting the outgoing IP
It is possible to set an outgoing IP for e-mail. To do this, you must first:
- Purchase your own IP address
- Add/change an entry
Ain DNS zone of the domain with an indication of theprivate IP address - Modify the
SPFinTXTentry in the DNS zone of the domain so that it also contains thenew (private) IP address, an example entry (in place ofXyou should put the server number):v=spf1 mx a ip4:PRIVATE_IP/32 include:mailX.serv00.com -all - Contact us to set up a
RevDNS for private IPentry - After
waiting 48 hoursfor propagation, change the outgoing IP address for mail
The option to change the outbound IP for e-mail is available in the DevilWEB account management panel:
E-mail ➡ Details with a selected domain ➡ Options from the top menu ➡ Outgoing IP
Limiting IPs authorized to log into the e-mail
This functionality allows you to define from which IP addresses it is possible to log into e-mail boxes in a given domain. Logins directly to the e-mail server using an external e-mail client as well as through our webmail are taken into account. This is another improvement in the security of the mail service.
The IP address limitation option is available in the DevilWEB account management panel:
E-mail ➡ Details ➡ Options from the top menu ➡ Login IP whitelist
Leaving the field blank for IP addresses removes the restrictions.
Warning
Logging in from unauthorized addresses will result in blocking these IP addresses, as is the case with login attempts with incorrect data. In order to unblock the IP use the form on the website: https://www.serv00.com/#unblock-ip)
If mail on serv00.com is received and sent using GMail you can specify Google server IP obtained from the command: dig +short txt _netblocks.google.com _netblocks3.google.com _netblocks4.google.com
Hiding the sender's IP address
Option that allows to hide the header containing the sender's IP address of the e-mail is enabled by default.
The option hide the sender's IP address is available in the DevilWEB account management panel:
E-mail ➡Details ➡ Options from the top menu ➡ Hide sender's IP and save the changes with the 💾 Save changes button.
By default, the header is 'hidden'.
Devil
Adding and removing an account
Adding an e-mail account is done with the command: devil mail account add MAIL_ADDRESS where MAIL_ADDRESS is an address in a previously configured domain (you can use the LOGIN.serv00.net subdomain). After entering you will be asked for a password.
Deleting an e-mail account is done with the command: devil mail account del MAIL_ADDRESS.
Adding and removing an email alias
Adding an e-mail alias is done with the command: devil mail alias add SOURCE_ADDRESS TARGET_ADDRESS where SOURCE_ADDRESS is the address from which messages will be redirected to the target mailbox address and TARGET_ADDRESS is the address of the target mailbox.
Removing an alias is done with the command: devil mail alias del SOURCE_ADDRESS.
Password change
Changing the password is done with the command: devil mail passwd MAIL_ADDRESS. After entering you will be asked for a password.
Changing the disk space limit
The change of the disk space limit (mailbox quota) is done with the command: devil mail quota MAIL_ADDRESS SIZE, where MAIL_ADDRESS is the e-mail address and SIZE is the disk space limit, for example: 2G, 300M. To calculate the occupancy of space by a given mailbox, use the command: devil mail quota MAIL_ADDRESS recalc
Change options
It is also possible to set options for the e-mail domain by using the command: devil mail options DOMAIN OPTION VALUE where the arguments are:
| DESCRIPTION | OPTION | VALUES | DEFAULT |
|---|---|---|---|
| RBL checking | rbl | on|off | on |
| Spam filter | spamfilter | on|off | on |
| Restrict SPF | restrictspf | on|off|reject | on |
| Move spam | movespam | on|off | on |
| Outgoing mail IP | outgoingip | Private IP|default IP | default IP |
| Login IP whitelist | allownets | comma-separated IP addresses | empty |
| Hide sender's IP | hidesenderip | on|off | on |
List of domains or accounts
To get a list of domains, use the command devil mail list [-v]. The -v switch isoptional and displays the number of e-mail accounts, aliases, and information about disabled additional options.
To get a list of mailboxes in a given domain, use the command: devil mail list DOMAIN.
Whitelists
Managing white lists is possible through the following commands:
devil mail whitelist add DOMAIN- adds a domain as trusteddevil mail whitelist del DOMENA- remove a domaindevil mail whitelist list- domain list
DKIM
To enable DKIM support for a selected domain, perform the following commands:
devil mail dkim sign DOMAIN- will generate DKIM private keydevil mail dkim dns DOEMNA [--print]- add to existing DNS zone or display public key
Warning
The sign command will generate a key and e-mail messages are signed immediately - add a TXT entry with public key to domain as soon as possible - otherwise e-mails may be be marked untrusted or rejected by mail servers. The dns command has the --print option - it shows the record that should be added by the user - this mainly applies to domains that do not use our DNS servers. Without specifying the --print switch, an attempt will be made to add an entry to an existing DNS zone.
Setting the outgoing IP address
It is possible to set an outgoing IP address for mail. To do this, you must first:
- Purchase your own IP address
- Add/change an entry
Ain DNS zone of the domain with an indication of theprivate IP address - Modify the
SPFinTXTentry in the DNS zone of the domain so that it also contains thenew (private) IP address, an example entry (in place ofXyou should put the server number):v=spf1 mx a ip4:PRIVATE_IP/32 include:mailX.serv00.com -all - Contact us to set up a
RevDNS for private IPentry - After
waiting 48 hoursfor propagation, change the outgoing IP address for mail
Command syntax:
devil mail options DOMAIN outgoingip IP|default
Where:
- IP -
purchased private IP addressorprimary (default) mail sending IP address - default - restore
default settingsfor sending mail viapublic IP address
Limiting IPs authorized to log into the e-mail
This functionality allows you to define from which IP addresses it is possible to log into e-mail boxes in a given domain. Logins directly to the e-mail server using an external e-mail client as well as through our webmail are taken into account. This is another improvement in the security of the mail service.
Command syntax:
devil mail options DOMAIN allownets IP_ADDRESSES
where IP_ADDRESSES is the allowed IP address, additional addresses (including CIDR IP ranges) should be entered immediately after the decimal point.
Leaving the field blank for IP addresses or setting "" will remove the restrictions.
Warning
Logging in from unauthorized addresses will result in blocking these IP addresses, as is the case with login attempts with incorrect data. In order to unblock the IP use the form on the website: https://www.serv00.com/#unblock-ip)
If mail on serv00.com is received and sent using GMail you can specify Google server IP obtained from the command: dig +short txt _netblocks.google.com _netblocks3.google.com _netblocks4.google.com
Hiding the sender's IP address
Option that allows to hide the header containing the sender's IP address of the e-mail is enabled by default, changes can be made from the devil command.
Command syntax:
devil mail options DOMAIN hidesenderip <on|off>
Where:
- DOMAIN - the domain for which we want to enable/disable IP hiding
- on - the sender's header will be removed from the e-mail
- off - the header will remain unchanged
Mail client configuration
Mail at serv00.com offers access to the mailbox via IMAP andPOP3 protocols and sending e-mails via SMTP. The server address for all protocols is mailX.serv00.com where in place of X you should put the number of the server on which the hosting account is located.
SMTP Ports:
- 25 -
PLAINTEXT/STARTTLS - 587 - only
STARTTLS - 465 -
SSL/TLSonly
IMAP ports:
- 143 -
PLAINTEXT/STARTTLS - 993 -
SSLonly
POP3 Ports:
- 110 -
PLAINTEXT/STARTTLS - 995 -
SSLonly
Account migration
You can use imapsync to move your e-mail boxes.
Webmail
Webmail based on Roundcube is available at https://mail.serv00.com/
When logging in, the user is directed to the given e-mail server after the MX records of the DNS servers to which the domain points.
To log in via our webmail to the e-mail account set up on the server, which is not indicated by the MX record, just use the address: https://mail.serv00.com/?Server=mailX.serv00.com where X is the number of the server where the account is located.
Message size
The maximum size of a single e-mail is 100 MB, after all message content (body and attachments) has been encoded in base64.
Spam
Antispam protection
The movespam option is used to automatically move messages that have been marked by our system as SPAM to the Junk (SPAM) directory.
Command syntax:
devil mail options DOMAIN movespam <on|off>
Where:
- on - messages marked as
SPAMwill be moved to theJunkdirectory (or according to Sieve configuration) - off - messages marked as
SPAMgo to theINBOXdirectory (or according to Sieve configuration)
Newly added domains have movespam set to on by default.
From the DevilWEB panel:
E-mail ➡ Details with the selected domain ➡ Options from the top menu ➡ Move spam
Classification
Unwanted messages that end up in an inbox but are not marked as SPAM can be sent to the address spam@serv00.com (as an attachment). The messages will be analyzed and on their basis a new database will be generated for the system classifying e-mails as SPAM.
In Roundcube (webmail) there is a Mark as junk button, which automatically sends us a message for analysis and moves it to the Junk directory.
Messages that have been incorrectly marked as SPAM should be sent for analysis (as an attachment) to the address admin@.serv00.com.
Notes on sending e-mail via websites and applications
E-mail messages sent without logging into the e-mail server (local or external), e.g. via the PHP mail() function, must have specified shipping address of an existing e-mail box or e-mail alias on a given hosting account. E-mails cannot be sent with an envelope sender to a foreign address. As well as on the domain side, it must be possible to send e-mail messages by our server (in SPF TXT).